Sun 10 Oct 2010
Ellen asked for some more detail on how I pick up and shape sleeves for a sweater. I’ve been thinking about this all week, and realizing that it’s very hard to turn something that is so intuitive to me into words. I’m a very spatially-oriented person, so I generally think in terms of vague 3D shapes, which I will attempt to turn into understandable drawings below. (Note: I was amused to see what my camera did to the color of white paper in these pictures; clearly I need to find better lighting for pictures before winter really settles in.)
Reading this over, it all seems rather complicated. Unfortunately, that’s often what words do to things that are really very simple. Keep in mind that I don’t really think about any of this while I’m knitting. I add an increase where I think it should be, and I decrease when I feel like it. Every sweater is different, and they all turn out just fine.
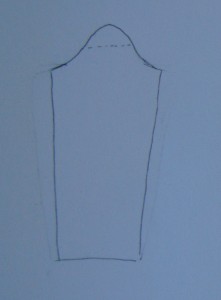
I think that most of my approach to garment design comes from a lot of years of sewing clothing, so I’m going to start there. Working with woven fabric is a lot less forgiving than knitting, and so sewing forces you to get pretty good at reconciling stubbornly 2-dimensional objects with a 3-dimensional body. Sleeves can be especially tricky, since there are lots of curves coming together in one place, and so there’s a lot of fiddling to get the ease just right. There are many, many variations, but the basic shape of a sleeve is something like this:
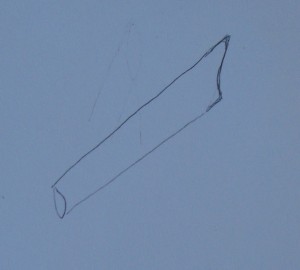
When you fold it in half and sew down the underarm seam, you get something like this:
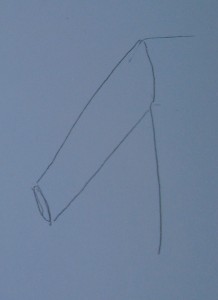
And that piece of material then gets joined onto the body like this:
Note that the curvature switches when the sleeve is attached to the body. In the drawing of the sleeve by itself, the part that will connect to the body curves to the left, like this (. When it’s attached to the body, it will stretch to fit the curve of the body piece, which is shaped like this ). There’s no magic here; it’s all one of those 2D to 3D tricks.
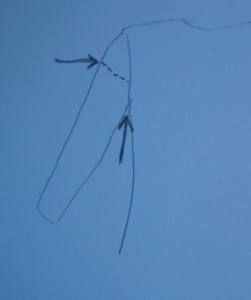
As far as I’m concerned, there are only two spots that are really important in shaping a sleeve, shown here with arrows:
The dashed line (roughly) matches the one in the first drawing of the sleeve shape when it’s flat. That’s the part that determines how much room you have for your shoulders. If it’s too tight, the sleeve will lay nicely when your arms are down, but will pull the whole garment up and off your shoulders whenever you raise your arms. Think formal suit jacket that’s slightly too small.
If it’s too loose, you’ll have no problems raising your arms, but you may end up looking like you have puffed sleeves. (If you’re Anne of Green Gables, this is a good thing, but generally for me it isn’t.) If you’re knitting for a guy that’s built like a football player, you may need to put in extra increases here. Otherwise, I tend to use as few as I can get away with and still let my arms lift.
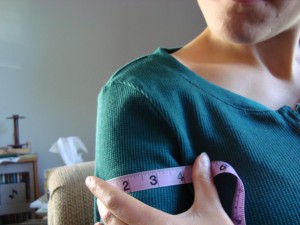
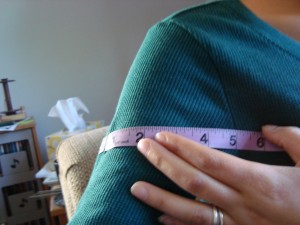
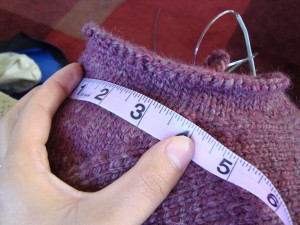
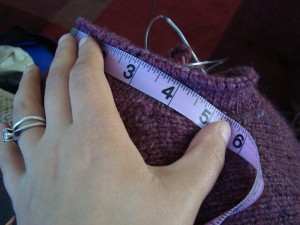
If you like to be analytical about things, I suppose you could measure. I usually just wing it. It is very hard to take pictures of yourself while measuring and holding the camera, but this might give you a rough idea.
Here, I’m holding my arm at my side and measuring from just above my armpit out to about halfway around my arm. (This is actually a little further than halfway, but I didn’t have enough hands to adjust.) It’s about 3 1/2 to 4 inches.
When I hold my arm out like I’m putting my hands on my hips, that increases the measurement to just over 5 inches. You will note that my shirt is properly constructed and moves with me, rather than being too tight and sliding up my arm. When you pick up shoulder stitches, you need to make sure that the sleeve cap is long enough to accommodate this kind of movement, or else you’ll feel like you’re wearing a straightjacket.
The other important thing to consider is the armpit. This is mostly an issue for body construction, since armpit placement is determined by how long you make the shoulder straps for the body. You do have to take the armpit into account when making the sleeves, though. Generally speaking, I like my armpit seam to fall about 1 1/2 to 2 inches below my actual armpit. If it’s much higher, I feel like I’m walking around on crutches. Having the armpit so low means that you need extra stitches to cover all that area. But you really don’t want them to stay there very long, or you’ll end up with a bulky underarm fold.
In order to avoid underarm bulk, I start decreasing right away once I’ve picked up the underarm stitches. The amount that I decrease and the rate of decrease depend on the sweater that I’m knitting. If the arm hole is very large, I have to pick up and then decrease more stitches. If the arm hole is very small, I only want to decrease a few. If I want a loose arm rather than a fitted arm, I should decrease fewer stitches. Here, I think a case study might be useful.
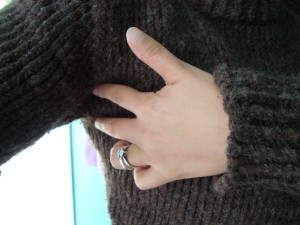
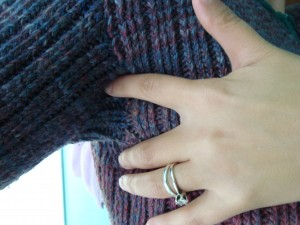
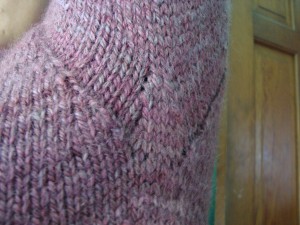
The arm holes were, admittedly, just a bit too small on the first handspun sweater. There’s only about an inch between my armpit and the sleeve join, which has only been saved from walking-on-crutches by careful stretching during blocking. It’s a nice, clean shape, but it’s just barely big enough to be comfortable for me to wear.
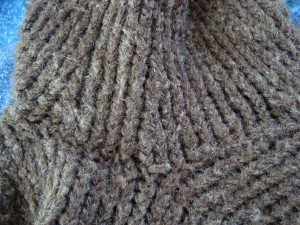
Because there were so few extra stitches, I barely decreased at all under the arm. (I see two decreases in the photo.)
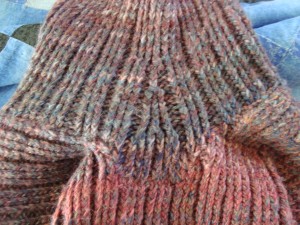
The next handspun sweater swung the other way. I didn’t split soon enough for the neck, and so ended up with extra long armholes. It’s probably a little over two inches from my armpit to the sleeve join.
I wouldn’t have minded a little extra space in the sleeves, but this sweater was generally curve-fitting, and I was short on yarn, so I kept the sleeves tightly fitted, too. To do that, I actually added 3 or 4 short rows at the base of the arm hole before picking up stitches, so that I would have fewer to decrease out. My decreases were much sharper this time; it looks like at least 5 stitches in the first 2-3 inches.
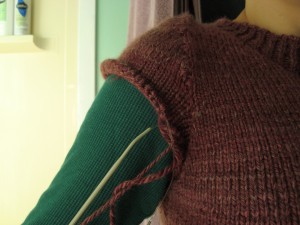
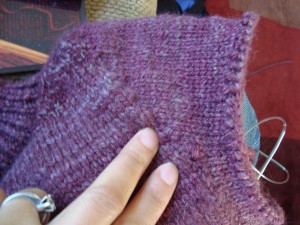
The current sweater is looking just about right. Here’s the sleeve cap without a sleeve:
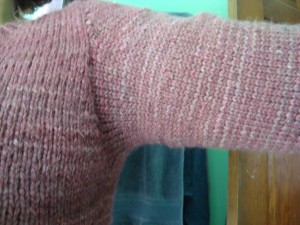
And here it is with a sleeve:
(Yes, I changed sides on you. No, I have not grafted on the second sleeve yet.)
I think this one falls about an inch and a half below my armpit, but I couldn’t do the camera wrangling with my left hand, so there are no fingers to indicate actual armpit height for this sleeve.
Here, the underarm decreases are intermediate; I took out 4 stitches rather quickly, leaving a small triangle shape at the base of the sleeve.
So now the only piece missing is the sleeve cap itself. It seems like there’s a lot going on, but there really isn’t. I start by picking up 6-8 stitches at the top of the shoulder, straddling the shoulder seam. I usually pick up 6 for me, 8 for Branden. Of course, the exact number also depends on gauge, but generally you want between an inch and an inch and a half to start with.
Then, I work short rows, picking up one stitch at the beginning of each row (make sure to do this in both the front and the back of the sleeve. It’s easier for me to pick up stitches on a right-side row, so I often just pick one up at the end of a row, before turning the work over to purl back.) I keep doing this, adding one stitch per row, until I get close to the width I need for my dotted line in the drawing above. This is usually a few inches of short rows.
When I think I’m getting close to having enough stitches, I continue picking up one stitch at the beginning of every row, but then I immediately decrease to cancel it out. This gives me extra length without adding extra width. For the current sweater, I needed to do two pick-up/decrease pairs (they’re mirrored on the back, so there’s really a total of 4 pairs).
Incidentally, those pairs happened at exactly 4 inches, which corresponds quite nicely to the 3 1/2 to 4 inches that we measured earlier for an arm laying flat at my side. They are also about an inch to an inch and a half above my actual armpit. (I honestly had not measured or even thought about this until I was trying to describe it for this post. Sometimes theory meets practice surprisingly well.)
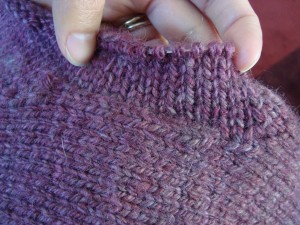
After I have worked these pick-up/decrease pairs, I then pick up all the way around the sleeve hole, and begin knitting in the round. (Here, my thumb is at the pick-up/decrease pairs and you can see the armhole decrease triangle on the far right of the picture.)
I work the underarm decreases to take out the excess fabric, and I’m left with a sleeve cap that is about 5 1/2 inches from the fold to where it meets the body. (Again, note eerie similarity to the hands-on-hip measurement above.)
At this point, I just knit in the round, decreasing as I see fit (usually two stitches every 2 inches to the elbow, then two stitches every inch or inch and a half to the cuff). Since I dislike the weight of the whole sweater hanging on my needles, I just cast on again with a provisional cast-on and knit the sleeve separately, and then graft it on when I’m done.
So, to summarize.
1) Relax. It’s not as hard as it sounds.
2) Pick up about an inch of stitches symmetrically about the shoulder seam on the body.
3) Work short rows for ~4 inches, picking up one stitch at the beginning of every row.
4) Continue as in 2, unless it seems that you are getting too many stitches on the needles. If you think you’re increasing too much, follow each picked up stitch with a decrease. I don’t usually need to do more than four pick-up/decrease pairs (two at the front, two at the back), but that’s mostly determined by your row gauge, so it’s different for every project. If knitting for someone with large upper arms, I would omit the decreases entirely, and possibly even consider some extra increases to get the necessary width in this area. Too loose is better than too tight.
5) When short rows are at about 5 inches long, pick up all around the armhole and begin work in the round.
6) Begin underarm decreases immediately after picking up. Decrease in proportion to the armhole size and the desired fit.
7) Work sleeve in the round, shaping it however you like your sleeves to fit.
