Archive for May, 2012

The last couple of weeks have been something of a rollercoaster ride around here.

Mostly, my brain has been trying to decide just exactly how I feel about this move, and has been trying on every possible emotion in series, switching at random between one and the next like a two year old playing dress up in her mother’s closet with a stolen tube of lipstick and a pair of mismatched heels.

There are so many things wrapped up in this one little event in our lives.

First, there’s living near my family, which is…complicated. We’re excited to be closer to them again, but then being close also brings troubles of its own. It’s a bit of a tightrope to walk sometimes.

Then, there’s the job. I’ve been oscillating back and forth between insane overwhelm (you should see the completely unrealistic list of things that I plan to accomplish in 7 weeks this summer…hahaha! *insert maniacal laughter here*) and crushing imposter syndrome. The first is pretty normal; I am usually overloaded, and I know how to deal. I feel overwhelmed, but I also know that the important things are going to get done, and are actually progressing really well. That’s really not much of a problem. The second is harder. I don’t often suffer from lack of confidence, so this has been a curious thing to have living in my psyche. It’s been interesting to watch, really, when it’s not busy warring with my self-esteem. It’s kind of like having some wild, exotic animal take up residence in the back yard…a little unexpected, sometimes a little startling, generally just interesting to observe. (My self esteem is robust and is generally winning…no worries there.)

Then there’s the leaving. At first I felt guilty about making Branden move from a job he likes. Right up until he got a new one that he’s super excited about, and that’s closer to what he really wants to do (and that got him better pay to boot). Hard to feel guilty there, except for how he’s leaving a boss and colleagues that he really likes and a company that’s been good to him. But then, I tell myself, that’s business.

Considering how short a time we’ve been in Illinois, we’ve also made a lot of friends here that we’ll be sad to leave when we go. Moving to Massachusetts also puts us that much further away from our friends in Madison, who are many and sorely missed.

I’m also going to miss this house. We didn’t really “click” with the neighborhood, but the house is just about perfect for everything we need. It could use an unfinished basement or a heated garage, perhaps, and a bit more sun in the back yard for a garden, but other than that it really has everything we want in a house. The new one will also be very good, but it is missing a few critical things that are making it hard to be excited about from here (like a pantry, a full-sized refrigerator, and a dye studio). Still, it’s only for a year, and then we’ll move to a better place. Once we’re there, I’m sure I’ll fall in love with it for all of the reasons that we picked it, but lately I’ve been having a hard time seeing past the faults, I think mostly due to a general resistance to the move.

But then there is the ocean! It is hard to overstate how excited I am to be back by the Atlantic. It’s been a long time.

And, I’m excited about getting back into the lab and the classroom, and have lots of interesting things lined up for the summer and next fall (see unrealistic list, above).

In short, I’ve been feeling conflicted. Back and forth, up and down, right side up and sideways. I’ve been doing the only thing you can do in those circumstances; riding it out and moving steadily forward, one box at a time.

My office has been mostly packed for a couple of weeks. The pantry is all but empty, the bedroom is all in cardboard. We’ve sold the things we’re going to sell, thrown out or given away the things we no longer need, and put the rest in boxes. We’re getting down to just the things we need on a day-to-day basis, so we’re getting pretty close. We’ll finish up the odds and ends over the weekend, and then we pack the truck on Tuesday.

In the past few days, I think I’ve finally begun to get used to the idea. Something about saying final goodbyes, stacking all the boxes in the dining room, and planning the drive back East has made it all start to click into place.

On Thursday, I took down the dye studio. Instead of feeling like a loss, it felt like it was time.

This week, my brain started throwing ideas at me left and right. New knitting designs, twenty different blog posts, a million things to try and do with the website, other hobby ideas, research topics and questions, whole sections of a grant proposal in one fell swoop, and tons of other stuff that I don’t even know how to classify. The rest of my life might be neatly sorted and packed in boxes, but my brain is in a state of delightful chaos. The floodgates are open, and I’ve been writing and list-making and notetaking furiously just to keep up with the deluge.

Now we’re into the final countdown; Branden is around all weekend, so we’ll be finishing up the odds and ends, touching up paint, taking apart furniture, all those little things that have to be done at the end of a move. Were really close to done, and then it’s off to the open road.

Writing blog posts is a great decision maker for me. I start out a post with no idea of where I’m heading, and usually by the time I’m done some part of my brain has a pretty clear idea of what needs to be done. Sometimes it takes the rest of me a while to cotton on to the fact that a verdict has been reached, but it’s almost always there, somewhere, just waiting for me to stop and pay attention.

In the last post, I think it was the moment I wrote the words “kill your darlings.” I didn’t realize it at the time, but by the next morning I was pretty sure of what I had to do. The shaping wasn’t working: the shaping had to go.

The most beautiful forms in nature come out of utility. A snail doesn’t make its shell to be beautiful and perfectly designed; it makes its shell to keep it from being eaten.

Of course human design is a little more esoteric, and there are plenty of things out there that are made simply to achieve a certain (sometimes questionable) aesthetic, but at some point in practical knitting the design becomes less about some platonic ideal and more about making a garment that does what it’s supposed to do. Or, in this case, making a pattern that is easy to write and easy to follow.

Form follows function. Get the function right, then develop the form to match. Got it. Decision made. Easy, huh?

That left the challenge of exactly how to redesign the sweater waist shaping to be easier to incorporate into a pattern of multiple sizes.

The problem was really that the waist shaping and the neck shaping are both locked into the allover lace pattern repeats. If I want to increase by half a repeat, it will throw off one or the other because I need to keep the lengths the same.

But what if the waist shaping weren’t locked into the lace repeat in the same way? (This is option #4 in the last post.)

In that case, I wouldn’t have to move the waist shaping up or down by half a repeat when I change the size, and the neck shaping would stay in the same place. If I put the decreases into the lace pattern itself instead of leaving out a part of a repeat at the side, then I could put them anywhere I want within the garment, and the number of decreases would be proportional to the number of repeats in the piece (2 fewer stitches per repeat means more decreases when there are more repeats, and fewer when there are not as many repeats).

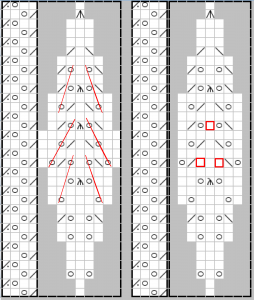
Fortunately, that’s very easy with this lace. There are three main lines of yo’s in the body of a lace repeat, and they are paired with decreases to achieve a gradual change in the pattern width. I wanted to keep those yo lines the same, but eliminate 1 stitch on each side from the widest part of the lace pattern. In the size that I’m knitting, that will eliminate 6 stitches from the front panel, which is about an inch of width in the final piece.

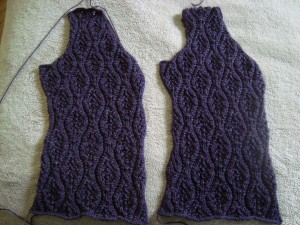
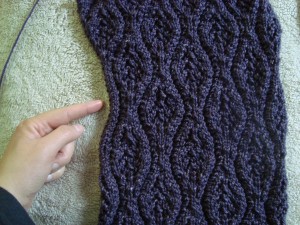
By leaving out two yo increases and then one “extra” decrease (the red boxes in the chart), I altered the lace to be the same height, but 2 sts narrower. I did lose one pair of yo’s in the main pattern lines, but it’s really not very noticeable in the final fabric. Here are the two versions side by side:

The one on the left has the original waist shaping, where I left out part of a pattern repeat at the underarm seam.

The one on the left is the new shaping, with the same number of repeats all the way through the garment, but with the narrower waist shaping chart knit in for one pattern repeat.

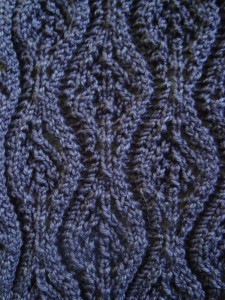
If you look veery closely, you might be able to see it here:

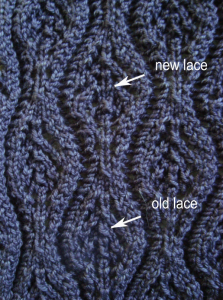
Or maybe not. How about now? (The arrows are pointing to the centered double decrease left out of the second chart.)

By replacing just one section of the lace with the new, narrower chart, I got almost exactly the same amount of waist shaping, and a much easier pattern to write.

It’s almost always worth it to let design support function, rather than the other way around.

Now if only I could remember that next time I’m captivated by a particular idea…

I’ve decided to go ahead and knit to the shoulder of the first side panel for the waving lace sweater. Now that I have all of the correct yarn measurements, it’s looking like I should be able to make it at the current gauge with the yarn that I have. I’ll double check my yarn usage when I get to the shoulder, but I think it’s going to work out ok.

Now that the knitting is back on track, I am turning my attention to the pattern writing for this section of the sweater. I’ve been finding that it’s easiest to break the pattern writing up into pieces that advance at the same time as the knitting. I’ll knit one piece, write its pattern, and then start knitting the next. That way I have a solid draft of the pattern written by the time I finish knitting the sweater, and in most cases it’s already semi-test knit.

Since I love to talk about process (and, judging by the comments, you do too), I thought I’d talk through some of the things I’m thinking about while writing the pattern. If there were such a thing as a Handbook of Pattern Writing, these are the kinds of things that I think it should contain…all the details you don’t think about until you get to the pattern writing stage and realize that you still have a lot of figuring left to do.

Incidentally, posts like this are precisely the reason that I will most likely self-publish all of my patterns. There is far too much “secret knitting” in the standard publishing world for my taste. I figure that if you’re the sort of person that can look at a schematic and knit the sweater, then you’re probably also the sort of person that can look at a picture of the sweater and knit the sweater. Either way, you don’t really need the pattern, and I think it’s far more interesting to talk about design than it is to sell patterns, anyway. So without further ado, let’s poke around under the hood, shall we?

For both this and the lace ribs sweater, I’m finding that pattern grading (creating more than one size garment) is one of the most time consuming parts to write. Sizing up a fitted pattern isn’t a simple matter of scaling up the design; different directions increase at slightly different rates, so there are always adjustments to be made here and there to make sure  that the final piece will actually fit a human shape. This is proving to be a real challenge for the waving lace sweater, mostly because the lace motif is so large.

Right now, it’s looking like I am going to have to either write two different versions of the pattern to accommodate the different sizes, or publish a pattern where different sizes have a slightly different neckline.

The drawing below should give you a rough idea of how I’m shaping this pattern. It’s very simple, really: it just follows the curves of the lace. This inclination toward natural shaping was the first thing that inspired this sweater, and it’s one of my favorite parts of the design. When shaping for the waist I leave out half of one repeat of the lace pattern, then add it back with a little extra at the bust, then decrease following the lace at the underarm and the neckline.

So far, so good. I am knitting the version on the left; it starts out with 3 lace repeats and goes smoothly from there. The problem comes in when I want to change the size.

Each lace repeat is about 2-2.5 inches wide (with almost no blocking). Generally, garment sizes are spaced about 4″ apart. That means that I would need to add half a repeat to each sweater front and one full repeat to the sweater back in order to go up one size. At first, that didn’t seem like a big problem.

And then I drew it out.

You can see the problem in the drawing on the right. Its underarm seam and side shaping is exactly the same as the one on the left, but the neck shaping has to start either half a repeat earlier or half a repeat later if it’s going to follow the lace. That will raise/lower the neckline by about 2″, which is a really dramatic difference.

It seems that I have three (ok…four) choices. The first option is to use only full lace repeats and publish a pattern that is “missing” certain sizes, and space the sizes at 8″ apart. That’s certainly the easiest option, and we saw in the last post that you can get a pretty big difference in size just by blocking the lace differently (it just so happens that the difference in the two blocking methods is about 2″ per front panel, which works out to 8″ across the whole sweater, which is the same size difference as adding a full lace repeat).

The second option would be to publish both the full repeat and the half repeat version shown in the diagram. That would allow a full complement of sizes, but the necklines would be different. Writing a pattern for both versions would involve two separate sets of charts and written instructions, meaning that I’d basically have to write two separate patterns.

The third option would be to add some kind of spacer column at the edge of the piece that would give it the extra inch needed to make the size adjustment.

I don’t really like any of these options. The first is by far the easiest, and if you account for changes due to blocking it covers the whole range of sizes. But I don’t really like the idea of having to change the base fabric of the pattern to get the size that you want (also, the grading may not work out perfectly because blocking does stretch the knitting in all directions simultaneously, and proper grading shouldn’t).

The second option is a lot more work, but I have to say I’m currently leaning in that direction. It would keep the basic gauge/fabric the same, which to me is a more attractive option. It’s not a perfect solution, though, because the necklines will be different. As with option 1, I don’t really like the idea of the design being controlled by the size you want to knit.

I’m reluctant to say that the third option probably makes the most sense; adding a non-lace panel would give me the extra flexibility that I want in the sizing without requiring as much fussing with the lace itself. It would still change all of the underarm increases/decreases, though, so it would probably still require two versions of the pattern. I’m also concerned that adding an extra panel would affect the flow of the lace shaping, which is really fun to knit.

Well, then. On to option four, which is really two in one: change the basic lace repeat, or change the design. Altering the lace to be a smaller repeat would help to make smaller steps in the sizing. It would also change the overall look of the fabric, but it could be worthwhile. I could also experiment with placing the increases and decreases differently, working them into the pattern a little bit more so that they can be adjusted more subtly. In the lace ribs sweater, I altered the individual lace repeats in order to get the waist and bust shaping I wanted, and so didn’t have to add much extra shaping.

Spreading the shaping throughout the sweater also gives me more power to control increases and decreases without changing the overall look of the piece. It doesn’t utilize the lace pattern as nicely as my original design, but I’m wondering if this might be a case of needing to “kill your darlings,” which is common advice given to writers, and basically means that sometimes you have to cut the best stuff in favor of producing a better flow in the whole. I don’t like this advice (few writers do either, I presume), but it’s often a lot easier to work with the design rather than fighting against it in pursuit of some ideal vision.

I’m mostly thinking out loud at the moment, so I haven’t yet come to any real conclusion about what needs to be done. I think I’m likely to end up with some version of option 4. I don’t really want to go all the way back to the drawing board, but it would be worth it if it gets me a better design. I have a sinking feeling that I’ll be reknitting that front panel in any case, but first I think some swatching is in order.

My waving lace sweater is beautiful.

My waving lace sweater is cursed.

It took me at least 6 tries to cast on and get the right number of stitches for the number of repeats I wanted. At the time, I chalked it up to my general state of mind over the past week, but now I’m thinking it was an early warning sign.

After finally casting on successfully, I knit one and a half lace repeats in, and realized that the piece was looking a little wider than my swatch said it would be. That’s not abnormal for me; my swatch usually tells me what needle to use, and then the first few inches of knitting the actual garment are what gets me an accurate gauge. (I almost always rip back the first few inches. I just don’t knit the same way on a small piece as I do on a large one, and no reasonably-sized swatch seems to help.) I solve this by thinking of the first few inches as a really big swatch, and count myself lucky if I don’t have to pull back.

This time I did have to pull back, and took out half a repeat of the lace to make it a couple of inches narrower.

I cast on again, and knit a repeat and a half in. Then I realized that I’d shifted the lace pattern from my sketch when I started knitting, which then put the side shaping in the wrong place.

So I pulled out, and cast on again.

I’m almost done with the bust shaping, and tonight I was getting ready to move into the neck front shaping when I noticed that the ball is looking a little bit small.

I have 5 balls of yarn (1350 yards!), and this is one side panel of the sweater front, which is a little less than 1/6 of the knitting in the sweater. If I use a whole ball on this one piece, then I’m in trouble.

I probably called this curse upon myself when I typed the words “Since I am not short on yardage this time, I can make the fabric much more solid than before, and more like my original vision of the piece.” See that there? That bit about short on yardage? Hmmph.

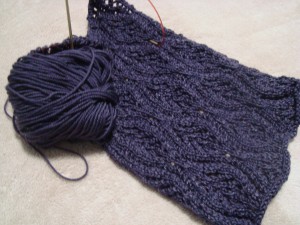
The photo above shows the fabric as I’d imagined it for this sweater. The lace is barely stretched, making it look almost solid, but with a very three dimensional texture. I really like it. I weighed what I have knitted so far (50 g), and what’s left in the ball (21 g). That’s not good news, since I’m only to the underarm and still need to knit to the shoulder.

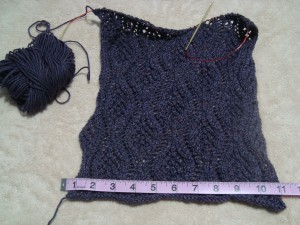
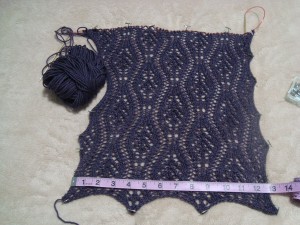
So, I looked at what I could get by blocking it harder.

Even dry, the piece stretches easily to almost 13″ rather than the necessary 10.5. I could take out a half a repeat to save yarn, if I’m willing to go with a more open fabric. (Of course, I’d have to knit the whole thing again, too.)

But something in the math didn’t quite add up. I was pretty sure that these were 100 g skeins, and I had a total of 70. That was odd.

Then I remembered the swatches.

Sure enough, a couple of dense stockinette swatches and a few repeats of lace add up to about 30 g.

So, I’m close. It looks like the sweater front is going to take about 70 g. If we assume that one front panel is about 1/6 of a sweater, that would mean that the whole thing would need about 420 g, which is 20 more than I have. 420 g is hardly an exact number, but it’s enough to tell me that I’m probably cutting it close.

Now I’m torn. Do I forge boldly on, and trust that kind fates will see me through? Keep knitting, and see how much the front panel weighs when I get to the shoulder? Or tear back now rather than knit another third that will need to be ripped in the end?

This feels like a case study in one of those popular non-fiction books that talks about the psychology of decision making and economics (I’ve read a few.). Some academic expert goes on and on at length about how our decision making isn’t rational, and how the decision you think you’d make isn’t really the one that makes good economic sense.

Those books always leave me feeling slightly less able decide. There’s always the question looming “yes, but is it rational??” in a slightly mocking father-knows-best kind of voice. The arguments are so counter intuitive and inside out that I can never quite remember which part is the rational part and which part is the one that most of us common mortals would choose.

I’m pretty sure in this case that it’s stupid (from an economic standpoint) to knit on. The probability of pulling back is high, and it’s very likely just my loss aversion getting in the way of ripping back now and being done with it. And yet, I still hope.

If I can get to the shoulder at under 65 g, I might just make it.

And, unless my intellect manages to stage a successful intervention, I think I might just try.

20 minutes later, edited to add: 5 skeins x100 yards = 500 yards, not 400. 420 is less than 500 (I think I can be completely certain about that). It’s totally possible that I could make it at this gauge, as long as the side panel is less than, say, 80g. Good thing I didn’t rip before going to bed…

Take that, economics brain!

Knitting has been a bit slow around here lately, as I mentioned a couple of posts ago, but I’m beginning to see harbingers of its return.

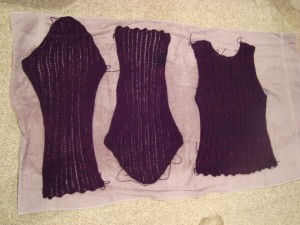
First, I finished a sleeve.

Isn’t it amazing how big those sleeves look? It always amazes me that the sleeves take almost as much fabric as the body. I know it makes sense, but it always surprises me to see the pieces all laid out.

This has been hiding as a background project for so long now that you might even have forgotten that it exists. (I think I almost did.) It’s a reknit of the lace ribs sweater, which we last saw in February. The second sleeve has been inching along as my travel knitting project, mostly advancing by a few rows here and there at knit night. But it’s finally done, and the pieces are all blocking in preparation for seams. I’ve been writing and sizing the pattern as I go along, which is part of why it’s been so slow. It is almost there, though. A few more tweaks to the charts, and some more sizing calculations for the sleeves and I think it’s done.

Since I’m finishing one pattern project, I thought that it might be time to start another. Last weekend I did some swatching for the updated version of my Falkland lace sweater.

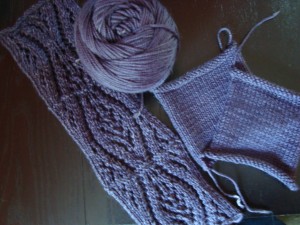
Since I am not short on yardage this time, I can make the fabric much more solid than before, and more like my original vision of the piece. These swatches were the result of me slowly lowering my needle size to get the fabric I wanted; something solid and firm that still shows off the lace. I’m also converting the pattern to be knit flat and seamed, because I think the structure is worth the trouble (though I much, much prefer knitting in the round). This sweater will be a far less fitted version than the last, with similar shaping but a lot more ease. It’s knit in Madeline Tosh Sport, and I am loving the fabric that it makes. This is another knit where I am writing the pattern as I go, so it will probably be a while in coming, but I think it will be worth the wait.

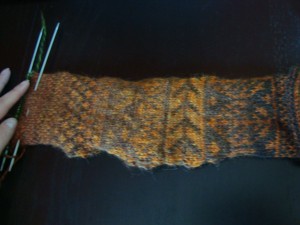
I’ve also been swatching for the fall colors sweater.

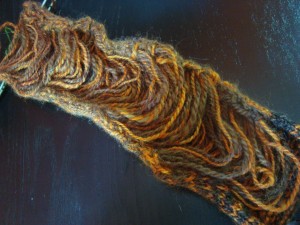
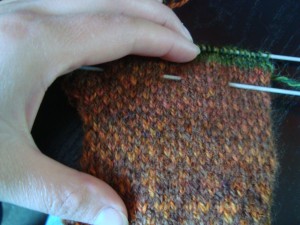
Isn’t that an awful, lumpy looking swatch? I’m still working out how to tension a fairisle swatch knit flat. The back looks like this:

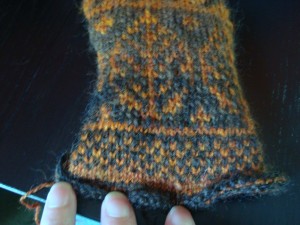
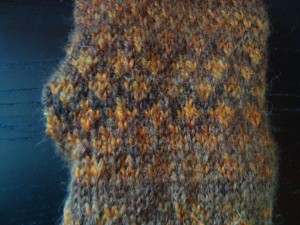
I also haven’t blocked it yet, so that might also have something to do with the unevenness. Even though it’s not pretty, I think it’s told me what I need to know. First, I need to knit on size 0 needles to get the fabric that I want. (This sweater is going to take forever.) Also, the yarns didn’t come out quite as different as I’d expected them to be. You can see how the complicated stitch patterns tend to disappear, because the orange and brown are sometimes quite similar  in tone. Look at the difference in this pattern knit in the high-contrast region

(at the very bottom edge there) and in the low-contrast region

See how much it gets lost there?

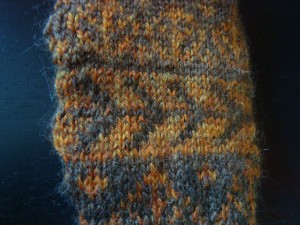
I’ve debated whether to dye the brown yarn darker or whether to work with it as-is, and right now I think I’m going to stick with it the way it is. Much as I like to think I control how my yarn will come out, I generally prefer to take my design cues from the fiber rather than forcing a yarn to fit. In knitting the swatch, I found that I really like the subtle color play of these yarns when knit in patterns with big, solid blocks of color.

I’m thinking of using this as an allover body design, possibly bordered with another blocky pattern as an edging or an accent detail. I’m particularly fond of this one:

This design is still settling into place in my mind, so I have a feeling that it will be a while yet before I cast on. But it’s starting to come together, slowly turning into a train knitting project for the months to come.

One by one, new knitting projects are sending up shoots. I’m hoping to have a few on the go by the time I start my new commute in a few weeks. Yay for dedicated knitting time!

With just over 2 weeks left to go before the move, the packing has begun in earnest. I’ve been carefully packing up and tucking away, getting everything ready for the long trip ahead. My office is half packed now, and is quickly shifting from workspace to cardboard city. I haven’t packed the dye studio yet, because there are a couple of things left that I want to dye before we go.
One of the biggest drawbacks to the new house is that there will be no dye studio. When we viewed the place, the landlords seemed open to the idea, and even said that they’d be willing to consider putting a sink in the basement. After we had committed to rent it (and after we’d turned everyone else down), we approached them about it again, even offering to pay to have a sink installed. At that point, they decided that it was “too complicated” and that they didn’t really want me to dye in the basement. (We’ll try to convince them otherwise once we arrive, but I’m not sure I hold out much hope after seeing all of the “thou shalt nots” in the lease. In the meantime, I am trying to remind myself that this is within their rights as landlords and to not hate them for it. Most days I have some success.)
So, we’ve been looking at other options for places to dye. Right now, it’s looking like I’ll probably use Mike’s (of the Mike sweater) garage, but he’s over an hour drive away. That means that dye days will require more planning, and will likely not happen as often.

I’ve been thinking hard about what this means for DesigKnit, and especially for the Etsy shop. I have a lot of stock left from the show, and I am planning to use that to slowly populate the Etsy store, mostly after we finish the move. After that, I’m hoping to do a dye day once every month or two, focusing on dyeing from pictures like I’ve done before, since that’s the most fun.

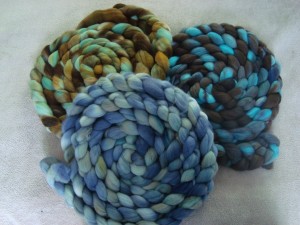
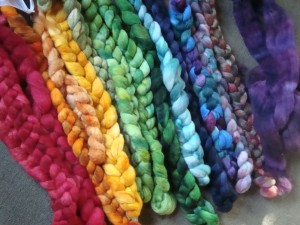
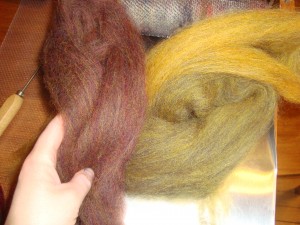
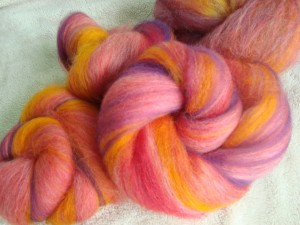
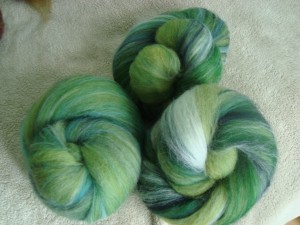
Since I want that dyeing to be primarily about the shop, I’ve been trying to dye up some things for my own consumption over the next year. We already know that I have lots and lots of natural color spinning coming up, but I also wanted a couple of colorful things to throw in between. Last week, I popped downstairs and made this:

That’s 3 lbs of Finn for a sweater for Branden that I’ve had percolating in the back of my mind for at least a couple of years now. Each colorway will be a different ply, which should make for a very interesting barberpole yarn.

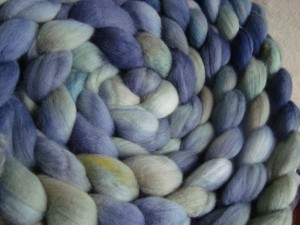
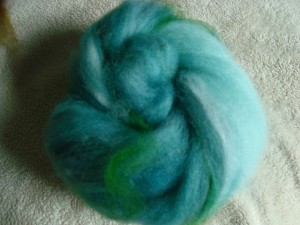
The first ply is a mix of pale greens and blues

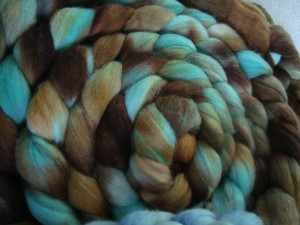
The second is a slightly brighter mint green, with accents of a yellow-brown.

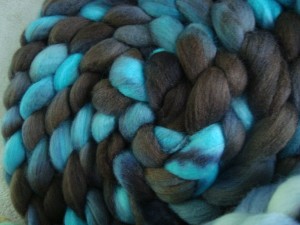
And the third is mostly black and gray with bursts of turquoise.

I’m hoping that dyeing the plies separately this way will give me the same almost-impressionistic color patterning that I got in the Sunset sweater, with perhaps a little less variegation. This isn’t an immediate spinning project, but it’s one that I’m looking forward to this fall and winter when I’m sick of grays. (And yes, 3 lbs is really, really overkill for a sweater, but after needing to match colorways in the last one, I wasn’t willing to take any chances. Also, I have a hunch that I might be able to find other ways to use these colors if I just happen to have extra.)

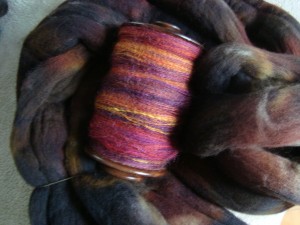
I also dyed up 4 oz of Rambouillet to go with the BFL-silk singles from the Fiber Optic top that I bought at GreenCastle.

I spun the Fiber Optic expecting to chain ply it into a three-ply, but the more I thought about it the more I wanted to stretch the yardage. Most of the handspun skeins languishing in my stash are there because I don’t have quite enough yardage to do this thing or that thing, and I want this to be a yarn that I’ll use right away. I didn’t want to do a random 2-ply, because I wanted the color repeats to stay separate. After a few days of mulling it over, I started thinking about maybe mixing it with another color, preferably something dark and mostly solid that would stand back and let the BFL-silk be the real star of the show. Then I started thinking about Jocelyn’s experiment with woolen and worsted spinning, and how much I liked the yarn she’d gotten. Of course, I hadn’t spun the BFL worsted, but I think I might be able to get a similar effect here. So I dyed up some deep, dark brown to match, and I should end up with quite a lot of 2-ply laceweight by the time I’m done. Isn’t it interesting how the brown dyes separated in spots to give reds and oranges that pick up the colors in the Fiber Optic?

One of the terrible side effects of dyeing for sale is that every once in a while I end up with a shop reject. Maybe the fiber compresses too much and won’t fluff up again, or it breaks while I’m trying to braid it, or maybe it’s even a teeny little bit felted (I’m looking at you, Finn). I’ve never dyed anything that I won’t spin, but I’ve slowly been building up quite a collection of braids that I won’t sell, for various and sundry reasons.

Since many of these braids are a little denser or a little stickier than I’d like, they’re not really super fun to spin. They do make beautiful yarns though, so every once in a while I’ll pull one out and spin it up (that’s how the Striped Shawl Sweater began, if you recall…one 4 oz braid from the shop rejects bag).

However, it occurred to me that I currently have a drum carder. As I sat and processed through all that cream and gray, I started thinking about mixing color at the carder, and how carding the rejected braids might turn them into something more fun to spin. I certainly had a good range of colors, and I’ve never tried making blended batts, so this was a chance to learn something new. If I decide that I love to blend batts (and especially if I consider blending for sale in the future), that may also affect which kind of carder I want to buy, so this seemed like a good opportunity to nail down one of the parameters that I’ll need to consider when I do eventually get around to purchasing a carder of my own.

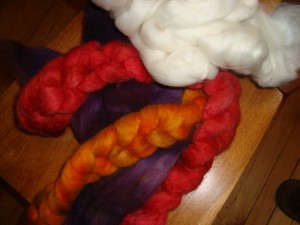
I gathered together a few colors that I thought would work well, and I started mixing.

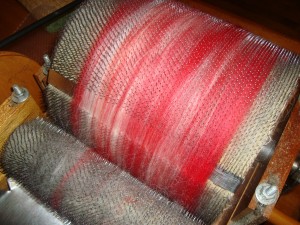
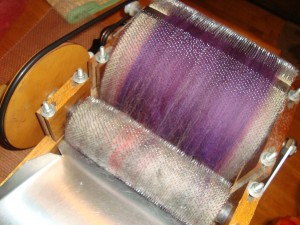
I put the red on the carder first, and then layered on a bunch of white. Then I blended until I had a pretty even pink.

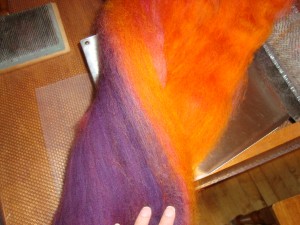
I put a layer of orange on the carder, then a layer of pink, and then covered it all up with a layer of purple.

That gave me a batt with three distinct layers of color.

Because I was experimenting, I passed it all through another time, which blended the colors together.

The colors ended up a bit more blended than I’d like, so I kept that in mind and moved on.

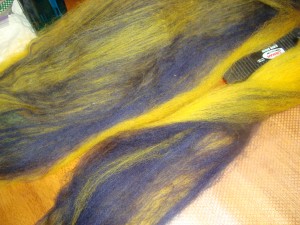
I also played around with mixing two very different colors; a deep navy blue and an almost orange gold. I was interested to see what these colors would do together, since it’s hard to dye such a high-contrast combination, and I thought this might be a way of mixing the two for an interesting yarn.

This experiment taught me that blending batts is far less forgiving than dyeing; I ended up with a pretty unattractive muddy green. I’ve found it almost impossible to get mud from my dyes, but blending at the carder is a lot more like mixing pigments than it is like dyeing, and there were a few combinations that I expected to work that flopped.

I kept this one as a reminder, but I also took a piece of it and kept blending and blending until it turned into a much more even green. Then I mixed some of that in with a red and blue mix that I didn’t love, and ended up with a very complex reddish-brown.

These still aren’t really my colors, but they do work well together. It’s almost like overdyeing; since all three colors have the same yellow (and two have the same blue), they match pretty well. Processed together, they made an interesting batt.

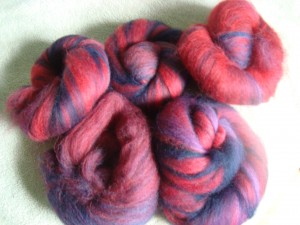
I wondered if maybe the yellow and blue had been too far apart in the color wheel, and so I did the same kind of blending with a red and blue instead, being careful not to overblend.

I do like these better, but I was beginning to suspect that I’d prefer mixtures that had one dominant color and a minimally blended stripe of an accent fiber, at least for the very bright colors that I had on hand. I would have liked to try “diluting” them down with browns, or grays or black to make a more subtle mix, but didn’t have any of those base colors on hand (and no, I wasn’t about to use my natural fleece for that!). I could dilute with white, but I’m not too big on pastel, so decided to work with a solid base color and minimal accents.

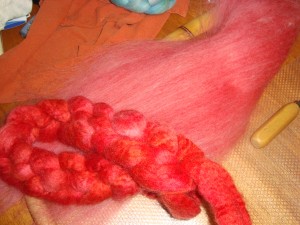
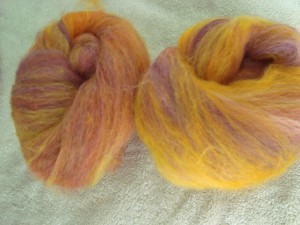
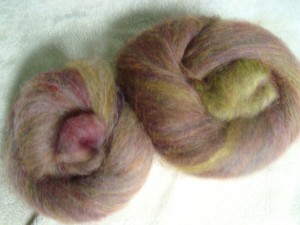
With that in mind, I revisited the purple, orange and pink combination from the top of the post, and ended up with this. See how those accent colors are  really just a very thin layer on top of the base pink? I assembled the batt in 4 layers (2 main color, 2 accent layers) to make sure there was some accent color in the body of the batt, but I think this proportion is a lot closer to what I’m going for.

I do like it quite a lot better than the first.

There really isn’t much of the accent colors in there, so it will be interesting to see how the colors work out when its spun up.

I liked that technique so much that I did it with a few more colors.

After all this testing, I was ready to try the mix I’d started out wanting to make.

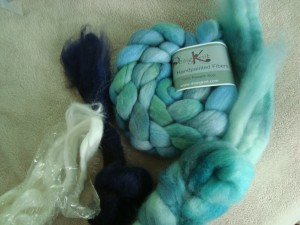
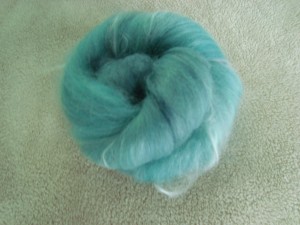
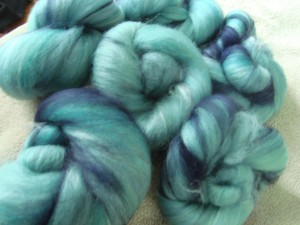
I had a green and blue semisolid Polwarth that I snagged from the shop, and wanted to blend it with a sample of banana viscose that I bought on a whim a while ago. I thought that if I blended it with a little more green (BFL) and some Navy (Finn), I’d end up with the colors of the ocean, and the shiny viscose would be like the whitecaps. Again, this is something that would be very difficult to dye, because I wanted very fine stripes of pure white, and just a touch of the different accent colors, which is almost exactly what I got.

I decided that the first one was a little overblended, so I adjusted my method yet again and finished up the 4 oz.

It looks like I made a ton of fiber, but actually I probably only have about 12 oz of batts. This carder seems to fit about an ounce per batt, and sometimes a little more depending on the fiber. It really didn’t take much wool to experiment, and it converted some less-than-exciting leftovers into something I can’t wait to spin. I’ve never spun a blended batt before; have you?

I don’t think I have many readers out in the RI area, but I just got an email from my friend Shelley at Coggeshall Farm (the shepherdess who cares for the sheep who grew my Gulf Coast fleece). They’re hosting the RI Wool and Fiber Festival on May 19th, and would love for you to stop by. I’m really wishing the show were a month later, but as it is I’ll have to wait for next year. Coggeshall is a fun historic farm in a beautiful area, and I hear tell that there will be vendors and live demonstrations, including a sheep shearing.

They’re also looking for volunteers to do things like help with parking and monitor kids’ games & crafts, should you be so inclined. A 5-hour shift gets you free admission and a free lunch. Just thought I’d spread the word!

It’s official:

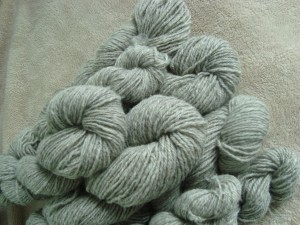
20 ounces of prepared roving takes me about 35 hours to spin into 1094 yards of three-ply yarn at a light worsted weight. Not bad, actually. I would have underestimated, but if you think about it, each one of those 1100-yard plies had to pass through my hands and then three of them had to be plied together to make the final yarn. That works out to about 120 yards an hour, or 2 yards per minute, which is really just about right when I’m spinning long draw.

I don’t think I’m likely to continue tallying hours spent on spinning, but it’s been very interesting to see just how long each step takes. And really, 35 hours to make a sweater’s worth of wool isn’t bad at all. I’m curious to see how long it takes to knit. (I’m guessing it will be longer.)

It is perhaps a good thing that I feel that way about spinning, because I realized last night that I’d spoken too soon. When I went back into the archives to check for a breed on the second fleece, I noticed that it had originally been 6 lbs. I thought the bag had looked a little small when I took it out of the closet to start carding, but I dug around a bit and didn’t find any more, so chalked it up to storage in a small space and didn’t think much more of it.

When we were carding, I thought I remembered that I’d had a darker gray color, but again dismissed the thought. But then when I saw that the fleece had weighed 6 lbs, I was pretty sure there must be more around here somewhere. I went and weighed the fleece we’d carded, and it’s just about 3 lbs, which would mean I’d lost 3 lbs in the washing. Even for a dirty fleece that would be a lot, and this was not a dirty fleece.

So last night I went stash diving to see just where that extra fleece might have got to. There really aren’t that many places for a bag of wool to hide in this house, and certainly not one of any size. But there is one deep shelf at the top of my stash closet that I am too short to access easily. It’s one of those shelves where you toss (soft) things up there and hope they don’t bounce back, and it’s where I have been storing the fleeces. I had checked back there, but if there was anywhere that a bag of wool could be, that would be the place. So I got a chair and poked around, and sure enough, there was another bag of wool, tucked away in a corner behind the fleece from Rhinebeck (which is now looking very lonely on that big shelf all by itself).

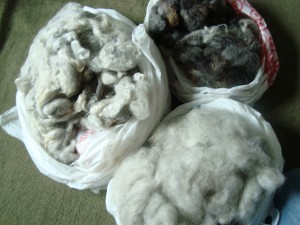
The remaining fleece is about 20 oz, and it was separated into three smaller bags: two are completely unprocessed, one is already hand carded, and one was full of that beautiful dark gray that I was sure I remembered seeing in this fleece. Apparently we’re not done with carding after all, but at least I found it before we returned the carder!

I haven’t felt like knitting lately. This happens every once in a while, and once I get over the shock I usually just shrug, shake my head, and wander off and do other things until it comes back. (It always does.)

Since I haven’t been knitting, I have been spinning like crazy. I’m about a half an ounce from done with the yarn for the Mike sweater (photos tomorrow, hopefully). And, we’ve been carding.

I say we, because Branden has been helping turn the crank for an hour or two each night, in addition to the cranking that I’ve been doing on my own. It goes pretty fast when he’s cranking and I’m teasing locks apart and feeding the fiber in, and we’ve made it through both fleeces:

The Gulf Coast needs one more pass through the carder before we’re done, but that should be really quick. The second fleece has been carded twice, so it’s set to go. I’ve decided not to comb that one, since it has a beautifully long staple and is pretty well aligned in the batts. It also has no short fiber in it at all, so it doesn’t need the combing to clean it up. I wish I knew what kind of wool it was; I know I bought it in Door County at the Shepherd’s Market a couple of years ago. Looking back in the blog archives, it appears the sheep’s name was Molly, and that she was a real sweetheart, though that of course tells me nothing about the breed. I remember that the vendor had very precise labels for her wool; I think it was down to the 1/8ths and 1/16ths for what kinds of breeds she had mixed in there. I think this was part Cheviot, but I’m not sure. I was hoping we’d find the label in the bottom of the bag, but it seems she kept it, so I’ll never know.

We carded the coarse part of the Molly fleece right after the Gulf Coast, and it felt thick and awful at first, more like hair than wool. But as we went I started to realize how much I liked it, especially when we got into the softer body of the fleece, and as the carding broke apart the thick, curly locks. It’s a great gray color, and there are a few different shades mixed in there. I separated them out in the locks, and we carded them separately, so I should get at least two different colors of yarn. The wool is definitely coarser than the Gulf Coast, but it’s actually quite soft so I think it will make a nice yarn. As with most longwools, the shine is amazing, and it feels very smooth to the touch. The staple is almost 7 inches, too, which will be a fun contrast to the short staples I’ve been spinning lately.

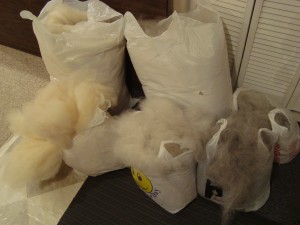
As we buried the kitchen table in wool again and again, I was really struck by how much the volume of wool increases after carding. Two fistfuls of locks become a huge, fluffy batt, and a couple of those batts look like they’d make a really good pillow, until you touch them and it all collapses again. The two fleeces fit comfortably in one garbage and one shopping bag before we started, and now they’re bursting out in all directions. It’s so delightfully fluffy that I hate to compress it down, but I’m afraid we’re going to have to if we want to fit into the moving truck. (Unless, of course, I spin it first…)