Mon 2 Jan 2012
After blocking and drying, Bright Lights was finally ready for surgery this morning. I’ve installed plenty of zippers into sewn clothing, but I’ve never attempted to put one into my knitwear, and I’ve never done a full-length steek, so I was pretty excited to get started.
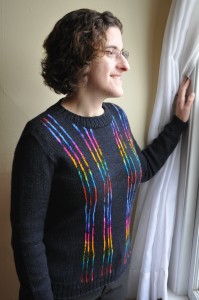
First, I tried it on in the pullover version to get a few more photos, and to measure the length of the sweater front when worn.
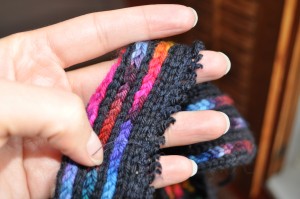
Then, I went to the swatch. I wanted to try a crochet-reinforced steek, but realized at the last minute that the black yarn is superwash, and so decided that a machine-sewn edge would probably be a good idea. First, I sewed a row of straight stitch, cut the steek, and then pulled and tugged at it to see what it could withstand.
The answer was: not much. I managed to get past the sewn stitches pretty easily, and then the inner stitches started to unravel. Clearly not what we’re going for here.
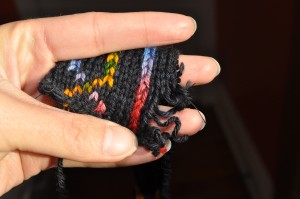
Next, I tried a zigzag stitch instead, with a width and length about the same as a single knit stitch at my gauge. This stood up to wear much better.
I did manage to get a few small ends to pull loose, but couldn’t get past the machine stitched line, even after several minutes of picking and tugging at it.
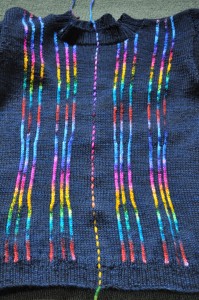
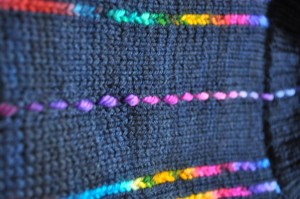
While doing the machine stitching, I discovered how easy it is to slip over a stitch or two and end up with a crooked line. I wanted a straight steek, so I decided to use some of the contrasting yarn to make a marker to guide my sewing.
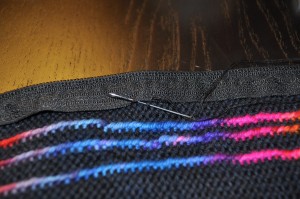
Then, I stitched a line of zigzag on either side of the marker stitches. (You can just barely see it here, if you squint.)
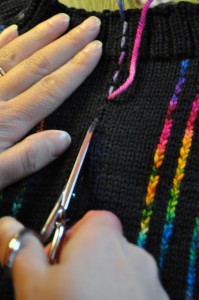
Once the edges were sewn, it was safe for steeking. I put a book between the layers of knitting to make sure I didn’t snip any stitches in the back panel, and started cutting along the marked line, pulling out my marker yarn as I went.
This is about the point that Branden came in to see what the gleeful chuckling was about, and took an action shot.
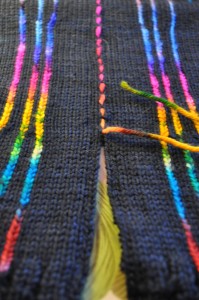
Here’s the raw steek after cutting.
Next, I rolled under the edge stitches (where the machine stitching is), and pinned the zipper in place. I made sure to use the length of zipper that I’d measured while the sweater was on my body rather than following the length that the steek seemed to suggest. If I’d pinned without measuring, I probably would have used 2-3″ more zipper, and it would have buckled when worn. (Thanks to Grumperina for that tip!)
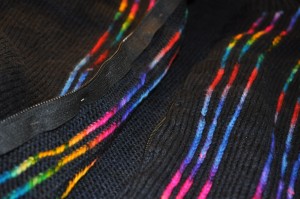
Once everything was pinned in place, I tried the sweater on again to make sure everything was behaving properly.
And then I began tighly handsewing the sweater to the zipper. I could have done this by machine, but handsewing let me get closer to the zipper, and it gave me more control over the very edge stitches. (More control is always good, yes?) I made sure to adjust the fold so that my stitches fell in the valley between two columns of knit stitches, and to use the same column of knits the whole way up the front. The sweater edge tended to roll while pinned, so I needed to be extra careful to check as I went to make sure that nothing had shifted.
I was also careful to line up the folded edge of the sweater so that the zipper teeth were just barely poking out from underneath. I pinned it with a little more zipper showing the first time, but the zipper was really obvious when I tried it on. Tucking the teeth further behind the sweater made them much less visible in the final piece.
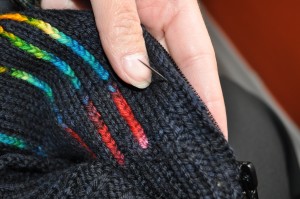
When the zipper was sewn in, I checked to make sure that I’d caught all the raw steek edges. You can see them tucked in there, right in the crease where the zipper meets the sweater fabric.
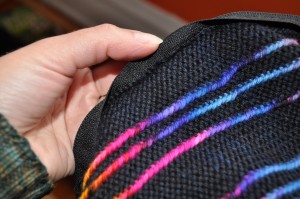
Then I whip-stitched the zipper flap in place, to protect those ends just a little bit more. This was a little trickier, because I needed to be sure to ease the zipper to fit the garment shaping. Since the zipper is stiffer than the knitted fabric, you want to make sure that it bends along with the sweater curves, or you’ll end up with lumps and bumps. Fortunately, it was pretty willing to follow the sweater shape, and then it was just a matter of whipstitching the curves in place.
Alternatively, I could have left the zipper tape free-hanging. It would have been secure enough, and it’s much more flexible when it’s not tacked down. I think it looks more finished this way, though, and it adds just a little more protection for those superwash ends.
And that was it.
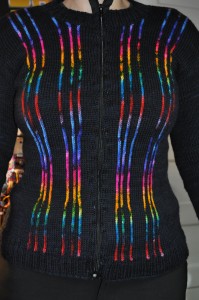
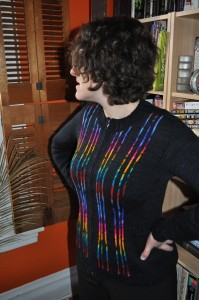
Here it is, all zipped up.
And half-zipped (the way I’ll probably wear it most of the time).

Your steeking experience turned out wonderful! Someday, I will take the plunge.
Wow, it looks good. You’re brave to steek superwash!
Wow! That turned out absolutely beautifully! And I appreciate the description of zipper installation. I’ve done one or two before, but always on garments with a more rustic (read: heavier yarn and lots of cables) look; it’s nice to see such a clean finish on something more tailored and fine.
Erica, it looks great! I am not afraid (any longer) to steel but zippers turn my blood cold. I won’t even consider a sweater that requires a zipper. Congratulations on a wonderful job.
Fabulous job! It looks so sleek and elegant. This sweater needs to be entered in a state fair!
(and turned into a pattern!!)
Lovely job! Haven’t braved steeling myself but it is on the list to do some day.
Absolutely gorgeous! What a way to start the new year!
The jewel tones totally pop on the black background. This sweater is definitely a design success. Congrats on your first full steek. I have moved steeking from “I’ll get around to it someday” to my list of must-do’s for this year.
Simply stunning…it looks great and looks even better on you. We all want to know…when will you have the pattern out?
Yes, this is nine kinds of awesome.
When machine stitching, did you have trouble keeping the sweater front flat and not bunching or pulling, or the sewing catching the sweater back?
I’m planning to insert a zipper the same way but I’m thinking of doing it before I join the sweater front, back and sleeves together. That way the sweater front is nice and flat for sewing, even though the general advice is to block, construct, then steek? Thanks!