Uncategorized


I’m afraid that the past two weeks haven’t been particularly knitty weeks. I’ve been doing a lot of reading, and a lot of running around, and just haven’t managed to sit still and knit very much. I’m going to New Orleans for a conference on Sunday, so next week will probably also not be very wool-filled. I’m actually debating whether or not it’s worth bringing knitting with me; I almost never end up working on it on this kind of trip, so it might not make it into the suitcase this time. But then, the idea of traveling with no knitting is a bit strange, too. We’ll see what happens when I pack tomorrow.

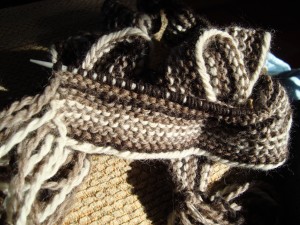
I did manage to finish Branden’s scarf, and even took a picture last weekend, which I then promptly forgot to post:

It’s done just in time, too. He’s flying back from Austria tomorrow, and then will meet me in New Orleans for a few days of exploring (him, not me, unfortunately), and then he’s home! And, being that he’s been in Atlanta all fall, I’m guessing that coming back to Madison weather is going to be something of a rude awakening. A scarf should be just the thing, and I love how it came out.

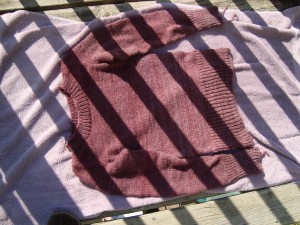
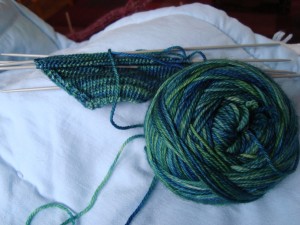
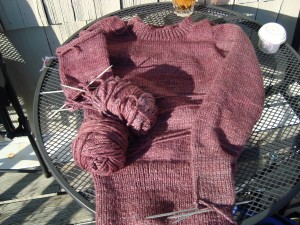
I’m also working away on the sweater in the in-between moments here and there. It’s starting to look like something:

(Sorry for the hideous picture, but if I wait until tomorrow to blog, it won’t happen.)

So, there you have it. Two weeks of not much knitting, a whirlwind trip, and then Branden is home. I guess it’s really no wonder that fall seems to be flying by! Hope you have a glorious weekend!

It looks like the blog opinion is about as torn as I am. It’s probably a good thing that I’ve been dragging my feet and playing with the swatch a lot.

Do you see that?

I thought I detected a tiny bit of bias in the knitting, but it disappeared completely when I blocked. But now, after a couple of days of petting, it’s coming back strong. It makes sense that a slipped stitch pattern that only goes one way would have a bias, but it’s rather unfortunate for garment design.

I had 90% decided to go with a slipped stitch cardigan, and I  was sorely tempted to cast on, but I wanted to wait for blog results. And now I’m glad that I did. I’ve knit a sweater with biasing yarn before (that time it was actually the yarn, not the stitch pattern), and there really isn’t a whole lot that you can do to keep it from stretching in odd ways. Especially with an open front.

I thought that maybe I could seam the sides to add some extra stability, but I’m not convinced that will actually help. I thought about trying to add some right-leaning slips to the stitch pattern, but I don’t think that will work based on the way it’s constructed.

So, I think the slipped stitch is out of the running, disqualified for bias. The last thing I want is another sweater knit on size 3 needles that gives me a slightly barberpole look, or worse, that has two front pieces that just won’t match for more than a couple of wears after blocking.

And so, I think the underdog wins. A deep border in trinity, with a body that’s stockinette. I do love the way the trinity feels. I’ll have to be careful not to spend too much time petting my cuffs, so they don’t wear out too fast!

Thank you all for your opinions! It’s nice to know that it will probably work out well either way, since the votes were so evenly split.

Guess it’s time to cast on, huh?

I had a plan. I’d take a short break from sweaters, and then work on one of the two projects next in the queue. Well. As soon as I’ve said that out loud, we all know that didn’t happen.

Instead, I received a package in the mail on Thursday, and have been enthralled ever since. The package contained yarn from Ruth at Impulse of Delight. I’ve been following her website and eyeing her yarn for about 2 and a half years now. Her sense of color is amazing, and there are many, many colors that I would love to knit with. In fact, there aren’t many colors in her store that I wouldn’t love to knit with. Each colorway is inspired by a photo, and I just love watching how they develop into yarn.

The trouble is, I have a lot of yarn. I have many, many projects to work on, and I’ve never had a specific idea in mind for this yarn. Also, it’s a bit expensive for my taste. I sincerely believe in paying people what they feel is a sustainable working wage, but there’s also a limit to how much I want to spend on a sweater, and there are many, many yarns out there to try. It’s also not as if her business particularly needs my support; her sweater quantities don’t come out very often, and when they are available they sell out very, very fast.

I’m not one to pounce on a project without considering, so I often choose to let the opportunity pass and wait for a different day. (This quality has saved me more stash enhancement than any other, and I am deeply grateful to my creative process for beginning with words like “ponder” and “reflect.”)

Recently, though, I’ve been more and more tempted. At this point, I’ve been pondering for a long time, and I love the yarn. It’s been harder and harder to resist.

About a month ago, there was a big shop update with a lot of sweater yarn. I was tempted. I passed. It was hard. And then, there was a sale.

After much dithering and discussion with my most powerful enabler, I decided that the time was right (even if I do have 4 or 5 things already lined up and waiting), and I went for it. I bought the Beary Surprise colorway, in worsted weight. You should go to her website to see the colors, because they are apparently too deep for my camera to do them justice, and the pictures below are really nothing like right.

I expected that the yarn would arrive, be petted, and put lovingly away to steep in the stash until I found a suitable project for it. Instead, it came in the door and immediately demanded to be wound into a ball. And then, since I already had a ball of yarn, I figured I should probably do some swatching.

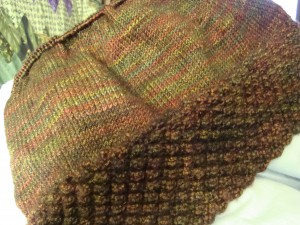
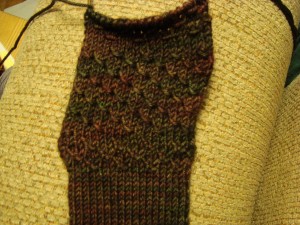
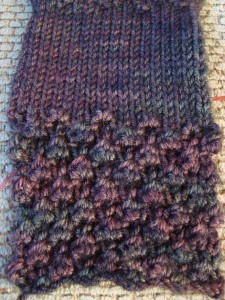
I am discovering that this yarn is very definite about its desires. Before I’d even finished winding, I knew I was looking for something nubbly, or at least something with a lot of texture. The blackberry (or trinity) stitch jumped out at me from no fewer than three stitch dictionaries, so I started with that.

I love the feel of the fabric, and I like the pattern when it’s stretched, but I’m not sure I love how it interacts with the colors. They seem to lose some of their nuance all balled up like that. I’m also not sure that I’ll have enough yarn for such a dense texture (I’m slightly close on the yardage; I went with one skein less than I’d usually buy, because I always seem to end up with an extra skein, and this is a pricey sweater as it is.)

The trinity stitch could work well as a border on a simple stockinette fabric, though. Then I’d get the texture and the simple play of colors in the knitting. (Do you sense the vacillation? Hope it’s not making you seasick…)

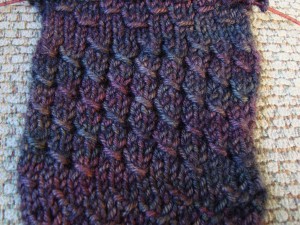
I wasn’t quite sure that was the perfect stitch pattern, so I headed back to the stitch dictionaries and found this one:

It’s an interesting slipped stitch kind of pattern, but it ends up looking a lot like little cables, without using the yarn that cables would require. Both this and the trinity stitch look a little lacy when blocked out, and I really like them both. I love the feel of the trinity stitch, but I think I like the look of this one better. This would be an overall pattern, where the other would be just an edging. They’re both beautiful, and they both work really well with the high twist BFL yarn.

I’m very, very torn. Any thoughts?

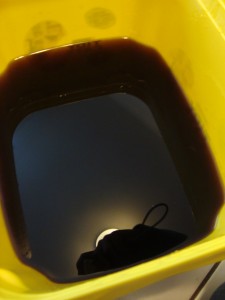
I haven’t said much about the indigo experiment lately, because there hasn’t really been much to say. I put in the yeast, and I waited. Not much happened. The liquid went from a greenish brown to a reddish brown, but there was no other difference. No happy bubbles to indicate that the yeast was doing its job and devouring the oxygen in the vat.

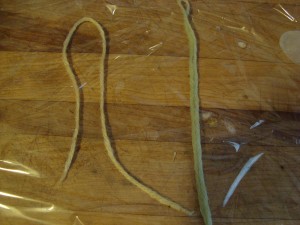
A piece of test yarn came back yellow, so the vat was definitely not ready to dye.

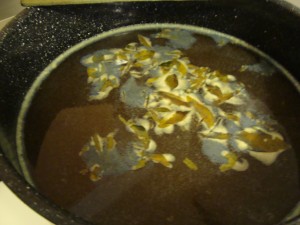
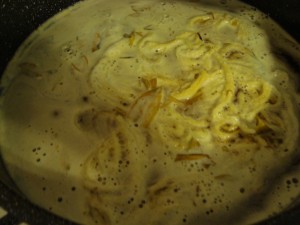
After three weeks of waiting, I decided that fermentation was clearly not going to work, and so I resorted to chemicals. I found a jar of Thioxx (a dye remover) in my dye supplies. I’d bought it a few years ago thinking that it might come in handy, and hadn’t used it since. This seemed like a good time for it to come in handy, so I added a little at a time to the indigo vat. Nothing happened until I’d added about 3/4 of the jar, when suddenly the whole surface went bubbly and tiny little blue flecks appeared in the foam. I took this to be a good sign.

And now, the test yarn was looking distinctly more bluish:

In went the yarn

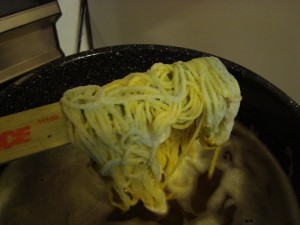
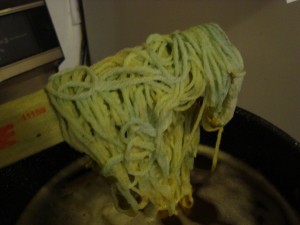
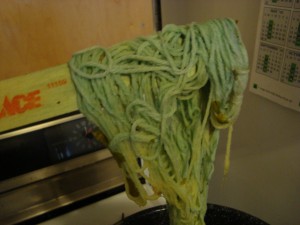
And I let it stew about 20 minutes. When I pulled it out, it quickly changed from yellow to blue-green:

(Those photos were taken less than a minute apart…it changes quickly!)

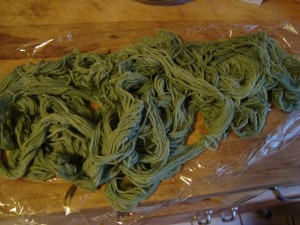
I tried several cycles of stewing and airing, as that’s what the websites say to do. My color didn’t really get darker, though. In fact, the first skein that I did (which was also the darkest) actually seemed to lose color with repeat dips. In the end, the skeins looked like this:

I decided to stop here, since they didn’t seem to be getting any darker and it was getting close to dinner time (multiple dips at 20-30 mins each makes for a long day of dyeing). I was thinking more about cleaning up and cooking dinner than I was about the yarn, so I filled the sink with water and threw the skeins in to rinse them of their chemicals.

Had I thought about this for even a few minutes, I would have realized that this classifies as a Bad Idea. I’m used to working with acid dyes, that actually bind to the fiber once heat treated. You always finish them off with a rinse to get out the extra dye. But indigo doesn’t work like that. Indigo dyes fiber when the dye dries in place. Throwing freshly dyed skeins into a sink full of water before they’ve had a chance to finish binding effectively removes all of the color that you’ve just painstakingly put in place. This became apparent as soon as I swished the yarn, but it was too late to do much about it. I finished the rinse so that the chemicals wouldn’t drip all over the bathtub, and we’ll see what comes of it. At the moment, they’re looking like a pale seafoam green, which is fine with me.

I’m rather surprised that all of this worked, given how little I knew about what I was doing. I learned that Thioxx gives off sulfur dioxide and smells up the kitchen, and that it irritates my sinuses. Fortunately, it was warm enough to open the windows for ventilation today, so it wasn’t too bad. I’m not sure that most people would even have been able to detect the smell, but I tend to be hypersensitive, and it appears that I need abundant fresh air when indigo dyeing.

As with the last time I did natural dyeing, I find myself unconvinced that it’s any safer than the standard “chemical” dyes. Honestly, I was a lot less comfortable working with strong bases and gas-producing reducing agents in my kitchen than I am with vinegar and a little dye dissolved in water. It was really fun to see the process, and it was cool to see the color change when the indigo hits the air, but I’m not sure that I’d call this any safer than my standard dyeing in saran wrap, and I think I’d prefer to wait until I have an outside area for dyeing before getting too serious about the natural dyes.

There were also a couple of things that I’d probably pay more attention to the next time around. Even my darkest skein was pretty pale, so I think there wasn’t a lot of dye in the pot to begin with. This could have been from the leaves themselves (the plants were well into blooming when we picked them, and they’re best before they flower), or it could be from too little base during the extraction. The base (washing soda) needs to react with the indigo in the leaves to prepare it for dyeing. If I didn’t add enough, I might not have extracted all of the dye from them. It’s also possible that the storage period did some damage, but I think that’s unlikely since you’re supposed to be able to store indigo vats for years at a time.

I also think that I ended up putting too much Thioxx in the dye vat. When indigo is exposed to air, it oxidizes to the blue dye that we know, but that blue dye isn’t soluble in water and so can’t bind properly to the fiber. You need the Thioxx to reduce the dye back to its soluble form so that it will actually end up on the yarn and not in the bottom of the vat. When you take the yarn out of the dyebath, it gets exposed to air, and the indigo gets oxidized back to its blue (insoluble) form. In a perfect world, you could then put the same skein back in the dyebath, wet it with more dye, and get a deeper color. My theory is that too much Thioxx would reduce the dye right back off the fiber as soon as the skein was put into the dye pot, thus removing dye from my darkest skein and making it get paler over time. I’m not sure that this is what happened, but I’m thinking of testing it again in a few days to see if I get more blue. (The Thioxx will continue to be oxidized by the air, and so should effectively decrease in concentration with time…)

All in all, I think that this was a pretty successful experiment. I didn’t end up with mounds of deep blue fiber, but I wasn’t really expecting that, and I’m honestly just glad that it worked at all. I’ve learned a little bit about the visual indicators that I’m looking for when making the dyebath, and I think I know what I’d like to tweak next time. And I have definitely learned that you wait until after the skeins have dried to rinse out the chemicals!

I have two more bunches of leaves (one frozen, one dried) to test out at some point. I’m not sure that I’ll get to it right away, but it will be interesting to see what happens!

I suddenly have nothing on the needles, what with all that finishing in the last week or so. I decided to take a short break between sweaters, because I thought it might be fun to have a couple of fast projects. There were some things in the stash that I thought were calling me, and I could use some small warm things now that fall is getting serious.

So, I cast on for a pair of handwarmers using a soy wool blend that’s been marinating in the stash for something like 4 years. (I thought it was about time, really.) But then I didn’t like the way it was knitting up, and I wasn’t getting the gauge I wanted, and this that and the other, and in short it was just wrong.

So I pulled it out and started over. I have another yarn that I spindled while in Germany, and I love the color and have been dying to use it. I’ve been mulling over the concept of a tam sort of hat since I started one in Germany that ended up not being a tam at all, but rather an interesting exploration of colorwork. I wound the yarn, and I cast on.

And then I promptly discovered that I’d done a much better job of making a fine fingering weight yarn than I had originally thought. I’d be knitting the hat on size 1 needles, with something like 10 stitches per inch. Not a bad thing, but not exactly a fast project. And, I decided that I wanted it to be somewhat lacy, which requires planning and thought and things like that. Not really my specialty at the moment (oh, but someday, someday…). The brain cells are still, unfortunately, occupied elsewhere, so I decided that my lacy tam is going to need to wait.

That left me back where I’d started. Two sweaters ready to cast on, and nothing in the snack knitting category. But I also needed bus knitting, so I settled on some stash busting activity instead.

Branden has always liked scarves knit lengthwise with different color stripes. They’ve always appealed, and they’re almost always garter. Fortunately, I prefer to knit scarves lengthwise, and my brain is currently managing to remain capable of garter stitch, so it seemed like a match made in heaven. Add to that the pile of Cascade Eco Wool that I still have left over after getting through his sweater (seriously, I swear that there is no end to it), and we had a deal.

So I wound a bunch of 7-yard pieces of wool on my warping board, and made them into little balls. At the beginning of a row, I grab a little ball of whatever color comes, and I knit to the end.

This was working great, except that I have (yet again) run out of little balls of yarn. Turns out that garter stitch takes a lot of rows.

So tonight, I’m spinning. And I’m thinking about winding up more yarn against tomorrow’s bus ride. In the end, it may have been easier to just cast on for the sweater…

There is about a month and a half every year where Branden’s age is not one but two years older than mine. That period begins today, and I generally take every opportunity to remind him that he is old now. (It’s very endearing, I’m sure. At least I can get away with it because neither of us is actually old yet, though I’m not sure that will ever stop me.)

This is also the first birthday since we’ve known one another where I am not around to remind him of this fact in person.

And so, I thought that perhaps the blog would be a good vehicle to say Happy Birthday, Branden! for this year. (Old man.) The kitties also send their love.

On Sunday, I finished the second sleeve. I blocked the sweater this morning, and now it’s out on the porch to dry. We’re supposed to have another record-warm day, so hopefully it will be done by this afternoon. I haven’t woven in the ends yet (just in case final adjustments need to be made), but it is done!

It’s almost noon, and you can see how steeply the sunlight is sloping. Winter definitely approaches.

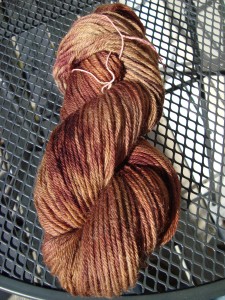
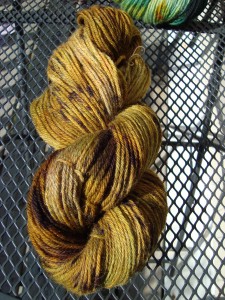
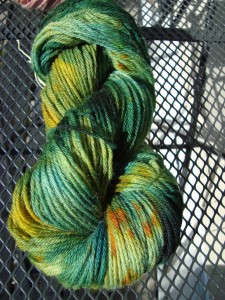
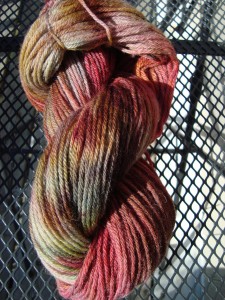
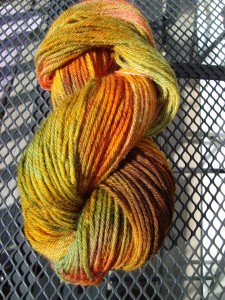
I also took some pictures of the dyeing I did last weekend. I was hoping to get pictures of the skeins laid out on the wood railing (a much prettier background), but a few seconds’ testing showed me that that would result in my skeins blowing away in the autumn breezes. So here they are, skeined up and safely sitting on the patio table instead.

My goals were first, to see what I could get from the new colors, and second to try for a more gently varied handpaint that might not show as much pooling. My neighbor and I were talking about this, and both of us love handpaints but don’t care for blotches of color. I was wondering if I could apply the dye in a way that would reduce the abruptness of the color changes. I’m not sure that I’m there yet, but I think this one comes the closest:

This one is also close, and its little spots of dark brown make me think of a giraffe. Wouldn’t it make a great toy giraffe?

This one is my absolute favorite. I love how the colors came out. I still think it would have patches, but I might not mind them in such pretty colors.

This one wasn’t quite what I expected, but I like how it came out. It’s kind of a Christmas-y set of colors, going from reddish brown to green.

This is my other favorite. It feels like it came straight from the maple trees outside, and I love it. I’m usually not a huge fan of orange or yellow, but I love them here.

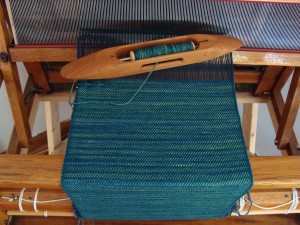
On Tuesday, I finished the teal scarf that was on the loom. I’ve just washed it, and it is hanging to dry. I’m hoping that it will be ready for pictures soon.

Ellen asked for some more detail on how I pick up and shape sleeves for a sweater. I’ve been thinking about this all week, and realizing that it’s very hard to turn something that is so intuitive to me into words. I’m a very spatially-oriented person, so I generally think in terms of vague 3D shapes, which I will attempt to turn into understandable drawings below. (Note: I was amused to see what my camera did to the color of white paper in these pictures; clearly I need to find better lighting for pictures before winter really settles in.)

Reading this over, it all seems rather complicated. Unfortunately, that’s often what words do to things that are really very simple. Keep in mind that I don’t really think about any of this while I’m knitting. I add an increase where I think it should be, and I decrease when I feel like it. Every sweater is different, and they all turn out just fine.

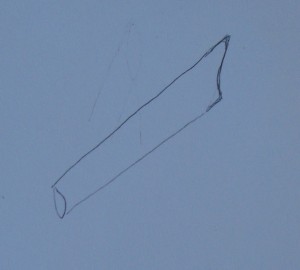
I think that most of my approach to garment design comes from a lot of years of sewing clothing, so I’m going to start there. Working with woven fabric is a lot less forgiving than knitting, and so sewing forces you to get pretty good at reconciling stubbornly 2-dimensional objects with a 3-dimensional body. Sleeves can be especially tricky, since there are lots of curves coming together in one place, and so there’s a lot of fiddling to get the ease just right. There are many, many variations, but the basic shape of a sleeve is something like this:
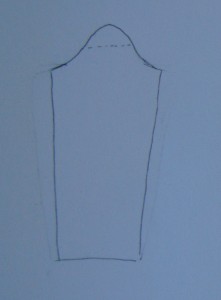
When you fold it in half and sew down the underarm seam, you get something like this:
And that piece of material then gets joined onto the body like this:
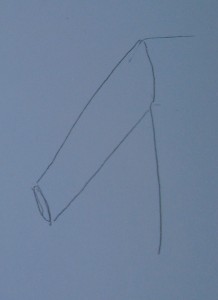
Note that the curvature switches when the sleeve is attached to the body. In the drawing of the sleeve by itself, the part that will connect to the body curves to the left, like this (. When it’s attached to the body, it will stretch to fit the curve of the body piece, which is shaped like this ). There’s no magic here; it’s all one of those 2D to 3D tricks.

As far as I’m concerned, there are only two spots that are really important in shaping a sleeve, shown here with arrows:
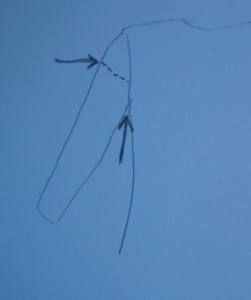
The dashed line (roughly) matches the one in the first drawing of the sleeve shape when it’s flat. That’s the part that determines how much room you have for your shoulders. If it’s too tight, the sleeve will lay nicely when your arms are down, but will pull the whole garment up and off your shoulders whenever you raise your arms. Think formal suit jacket that’s slightly too small.

If it’s too loose, you’ll have no problems raising your arms, but you may end up looking like you have puffed sleeves. (If you’re Anne of Green Gables, this is a good thing, but generally for me it isn’t.) If you’re knitting for a guy that’s built like a football player, you may need to put in extra increases here. Otherwise, I tend to use as few as I can get away with and still let my arms lift.

If you like to be analytical about things, I suppose you could measure. I usually just wing it. It is very hard to take pictures of yourself while measuring and holding the camera, but this might give you a rough idea.
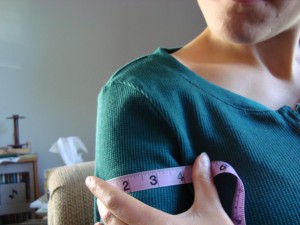
Here, I’m holding my arm at my side and measuring from just above my armpit out to about halfway around my arm. (This is actually a little further than halfway, but I didn’t have enough hands to adjust.) It’s about 3 1/2 to 4 inches.
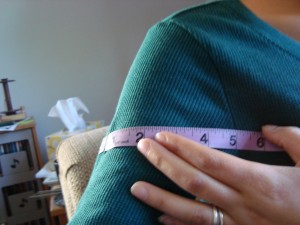
When I hold my arm out like I’m putting my hands on my hips, that increases the measurement to just over 5 inches. You will note that my shirt is properly constructed and moves with me, rather than being too tight and sliding up my arm. When you pick up shoulder stitches, you need to make sure that the sleeve cap is long enough to accommodate this kind of movement, or else you’ll feel like you’re wearing a straightjacket.

The other important thing to consider is the armpit. This is mostly an issue for body construction, since armpit placement is determined by how long you make the shoulder straps for the body. You do have to take the armpit into account when making the sleeves, though. Generally speaking, I like my armpit seam to fall about 1 1/2 to  2 inches below my actual armpit. If it’s much higher, I feel like I’m walking around on crutches. Having the armpit so low means that you need extra stitches to cover all that area. But you really don’t want them to stay there very long, or you’ll end up with a bulky underarm fold.

In order to avoid underarm bulk, I start decreasing right away once I’ve picked up the underarm stitches. The amount that I decrease and the rate of decrease depend on the sweater that I’m knitting. If the arm hole is very large, I have to pick up and then decrease more stitches. If the arm hole is very small, I only want to decrease a few. If I want a loose arm rather than a fitted arm, I should decrease fewer stitches. Here, I think a case study might be useful.

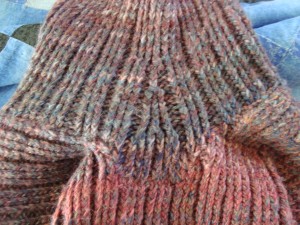
The arm holes were, admittedly, just a bit too small on the first handspun sweater. There’s only about an inch between my armpit and the sleeve join, which has only been saved from walking-on-crutches by careful stretching during blocking. It’s a nice, clean shape, but it’s just barely big enough to be comfortable for me to wear.
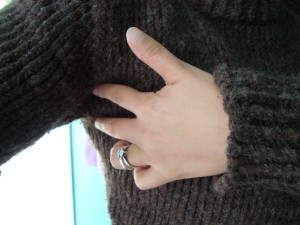
Because there were so few extra stitches, I barely decreased at all under the arm. (I see two decreases in the photo.)
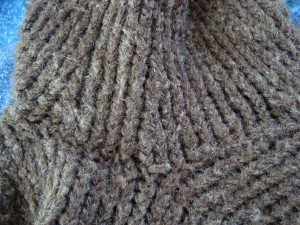
The next handspun sweater swung the other way. I didn’t split soon enough for the neck, and so ended up with extra long armholes. It’s probably a little over two inches from my armpit to the sleeve join.
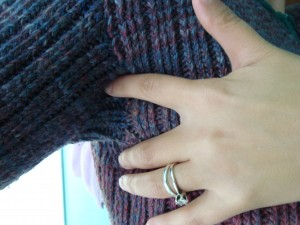
I wouldn’t have minded a little extra space in the sleeves, but this sweater was generally curve-fitting, and I was short on yarn, so I kept the sleeves tightly fitted, too. To do that, I actually added 3 or 4 short rows at the base of the arm hole before picking up stitches, so that I would have fewer to decrease out. My decreases were much sharper this time; it looks like at least 5 stitches in the first 2-3 inches.
The current sweater is looking just about right. Here’s the sleeve cap without a sleeve:
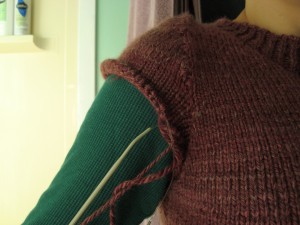
And here it is with a sleeve:
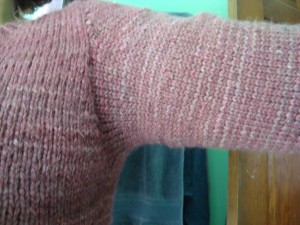
(Yes, I changed sides on you. No, I have not grafted on the second sleeve yet.)

I think this one falls about an inch and a half below my armpit, but I couldn’t do the camera wrangling with my left hand, so there are no fingers to indicate actual armpit height for this sleeve.

Here, the underarm decreases are intermediate; I took out 4 stitches rather quickly,  leaving a small triangle shape at the base of the sleeve.
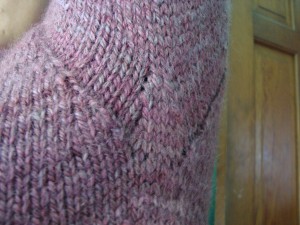

So now the only piece missing is the sleeve cap itself. It seems like there’s a lot going on, but there really isn’t. I start by picking up 6-8 stitches at the top of the shoulder, straddling the shoulder seam. I usually pick up 6 for me, 8 for Branden. Of course, the exact number also depends on gauge, but generally you want between an inch and an inch and a half to start with.

Then, I work short rows, picking up one stitch at the beginning of each row (make sure to do this in both the front and the back of the sleeve. It’s easier for me to pick up stitches on a right-side row, so I often just pick one up at the end of a row, before turning the work over to purl back.) I keep doing this, adding one stitch per row, until I get close to the width I need for my dotted line in the drawing above. This is usually a few inches of short rows.

When I think I’m getting close to having enough stitches, I continue picking up one stitch at the beginning of every row, but then I immediately decrease to cancel it out. This gives me extra length without adding extra width. For the current sweater, I needed to do two pick-up/decrease pairs (they’re mirrored on the back, so there’s really a total of 4 pairs).
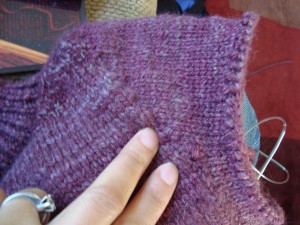
Incidentally, those pairs happened at exactly 4 inches, which corresponds quite nicely to the 3 1/2 to 4 inches that we measured earlier for an arm laying flat at my side. They are also about an inch to an inch and a half above my actual armpit. (I honestly had not measured or even thought about this until I was trying to describe it for this post. Sometimes theory meets practice surprisingly well.)
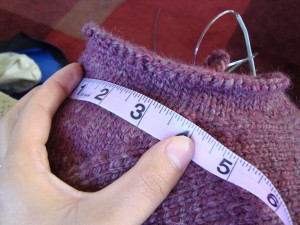
After I have worked these pick-up/decrease pairs, I then pick up all the way around the sleeve hole, and begin knitting in the round. (Here, my thumb is at the pick-up/decrease pairs and you can see the armhole decrease triangle on the far right of the picture.)
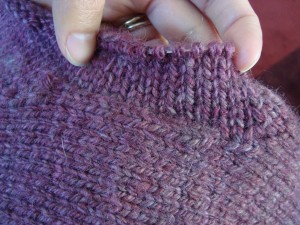
I work the underarm decreases to take out the excess fabric, and I’m left with a sleeve cap that is about 5 1/2 inches from the fold to where it meets the body. (Again, note eerie similarity to the hands-on-hip measurement above.)
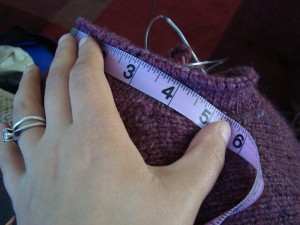
At this point, I just knit in the round, decreasing as I see fit (usually two stitches every 2 inches to the elbow, then two stitches every inch or inch and a half to the cuff). Since I dislike the weight of the whole sweater hanging on my needles, I just cast on again with a provisional cast-on and knit the sleeve separately, and then graft it on when I’m done.

So, to summarize.

1) Relax. It’s not as hard as it sounds.

2) Pick up about an inch of stitches symmetrically about the shoulder seam on the body.

3) Work short rows for ~4 inches, picking up one stitch at the beginning of every row.

4) Continue as in 2, unless it seems that you are getting too many stitches on the needles. If you think you’re increasing too much, follow each picked up stitch with a decrease. I don’t usually need to do more than four pick-up/decrease pairs (two at the front, two at the back), but that’s mostly determined by your row gauge, so it’s different for every project. If knitting for someone with large upper arms, I would omit the decreases entirely, and possibly even consider some extra increases to get the necessary width in this area. Too loose is better than too tight.

5) When short rows are at about 5 inches long, pick up all around the armhole and begin work in the round.

6) Begin underarm decreases immediately after picking up. Decrease in proportion to the armhole size and the desired fit.

7) Work sleeve in the round, shaping it however you like your sleeves to fit.
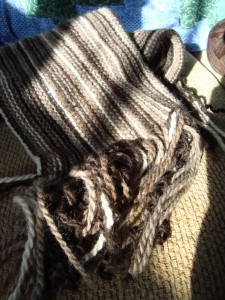
Remember the yarn that didn’t want to be socks?

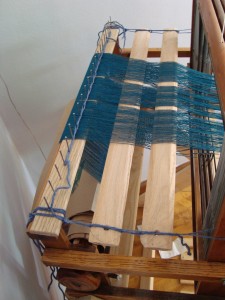
I warped up the loom for a scarf last weekend, using some very handy tools that Branden whipped up for me while he was home.

The piece on the left (the one with the nails in it) is called a raddle, and the two sticks on the right are called lease sticks. I’d heard of these things before, but they didn’t come with my loom, and my book said you didn’t strictly need them. I’d read about them, and then hadn’t really given them another thought.

Then, a couple of weeks ago one of the weaver’s guild members invited some of us over to watch her warp her loom with the yarn we dyed at the workshop. And I learned exactly how useful raddles and lease sticks are.

We made a trip to the hardware store while Branden was home, and he spent a couple of hours trimming and sanding away. They’re not really finished yet, but they’re finished enough to use. We put the warp on the loom Sunday morning, and by Sunday night I had all 300 ends threaded through the loom. A job that would normally have taken several evenings or a couple of weekend days took a matter of hours. Sometimes there’s just nothing like the right tool.

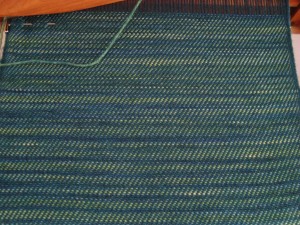
I’ve been dying to show you the fabric all week, but there just isn’t enough light in that corner when I get home from work. But now, for the record, I’d like to state that the yarn was right; this is exactly what it needed to be, and I am completely in love with it.

And, in case you want a closer look:

After two weeks of light frost overnight, the temperature is suddenly back in the 80’s today. I’ve been trying to just appreciate the day, especially as it’s most likely the last warm weekend we’ll have this year.  Of course, sitting in the sun on an 80 degree day is not always the best time for knitting, but I managed to attach the first sleeve to the sweater.
I was hoping that I’d have two sleeves to attach today, but I’m currently knitting the second sleeve for the third time. I wasn’t happy with the way the colors were working out, so I’ve pulled back twice, but now it’s working perfectly.

And, theoretically, this means that I’ll have another new sweater when the weather remembers that it’s October next week.

Happy weekend!

« Previous PageNext Page »